Apple Motion Time

Getting Started With Apple Motion

Apple Motion is exclusively for Mac, so for Windows users, there is no other way for you to run this program. We’ll start with the Apple Motion interface, and some ways to adjust the layout of the window interface.

Let’s start with opening Apple Motion and creating our first composition. You will be presented with the following window.

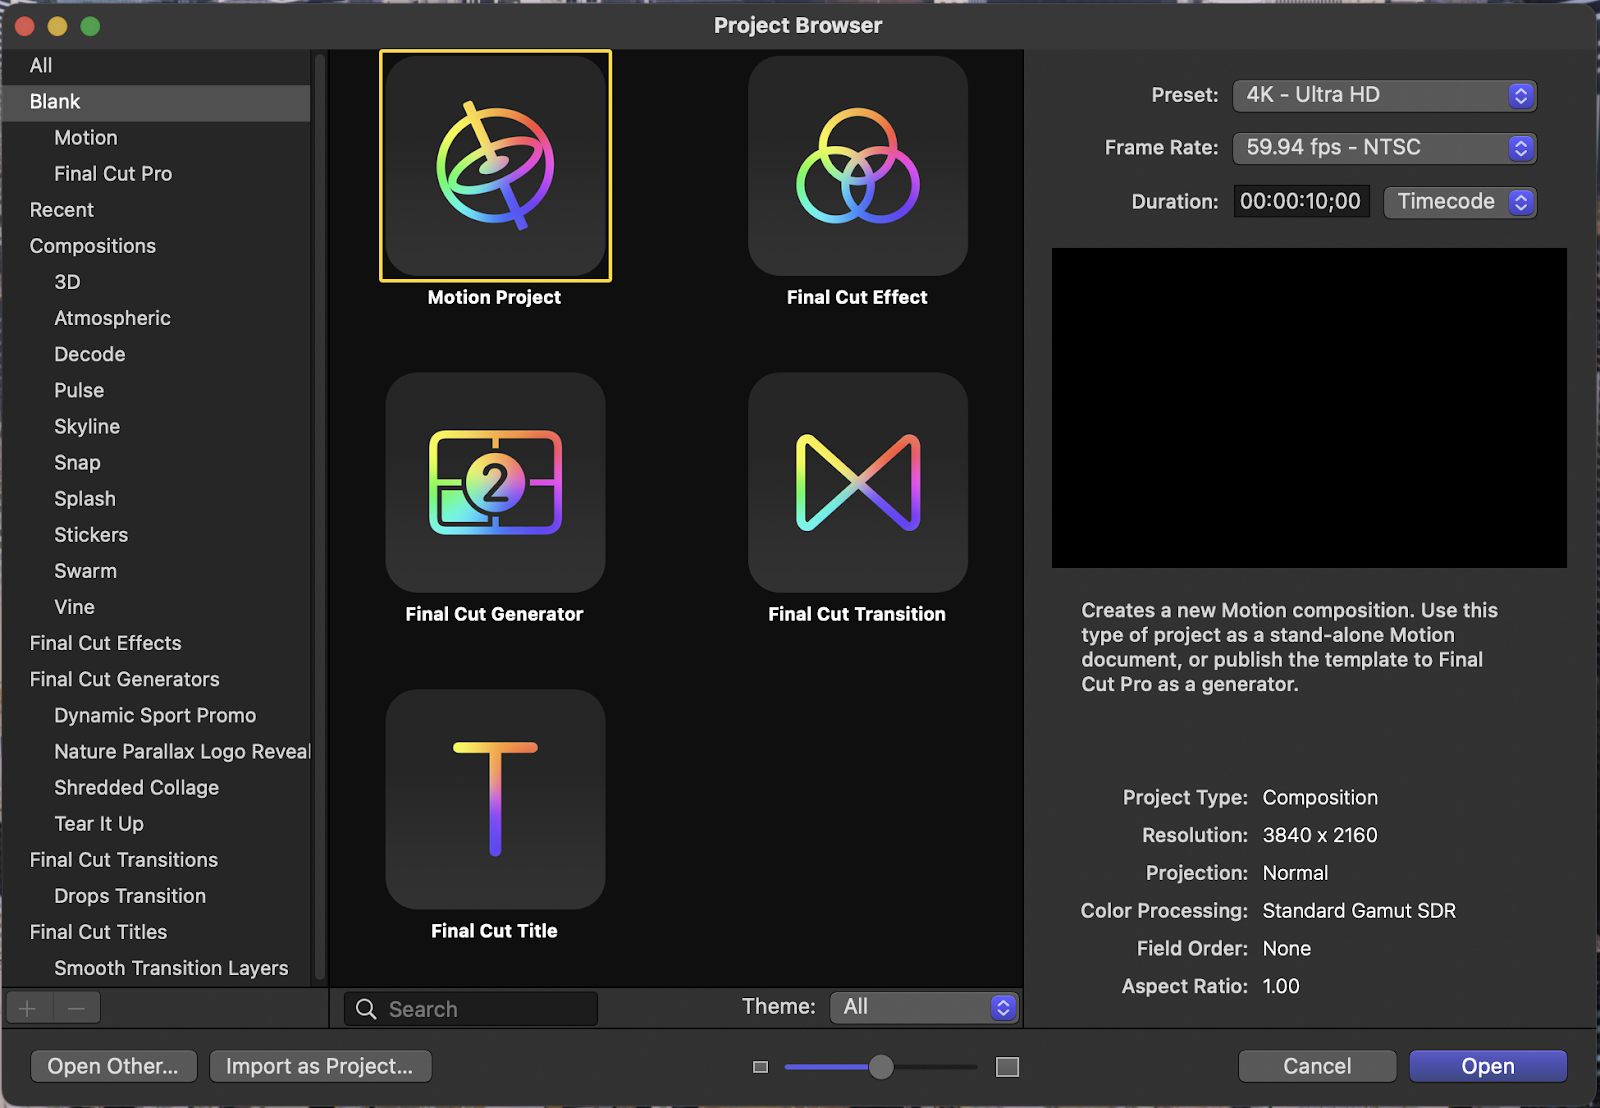
Your settings might be different from mine, but don’t worry. For now select “Motion Project” and then click “Open”.

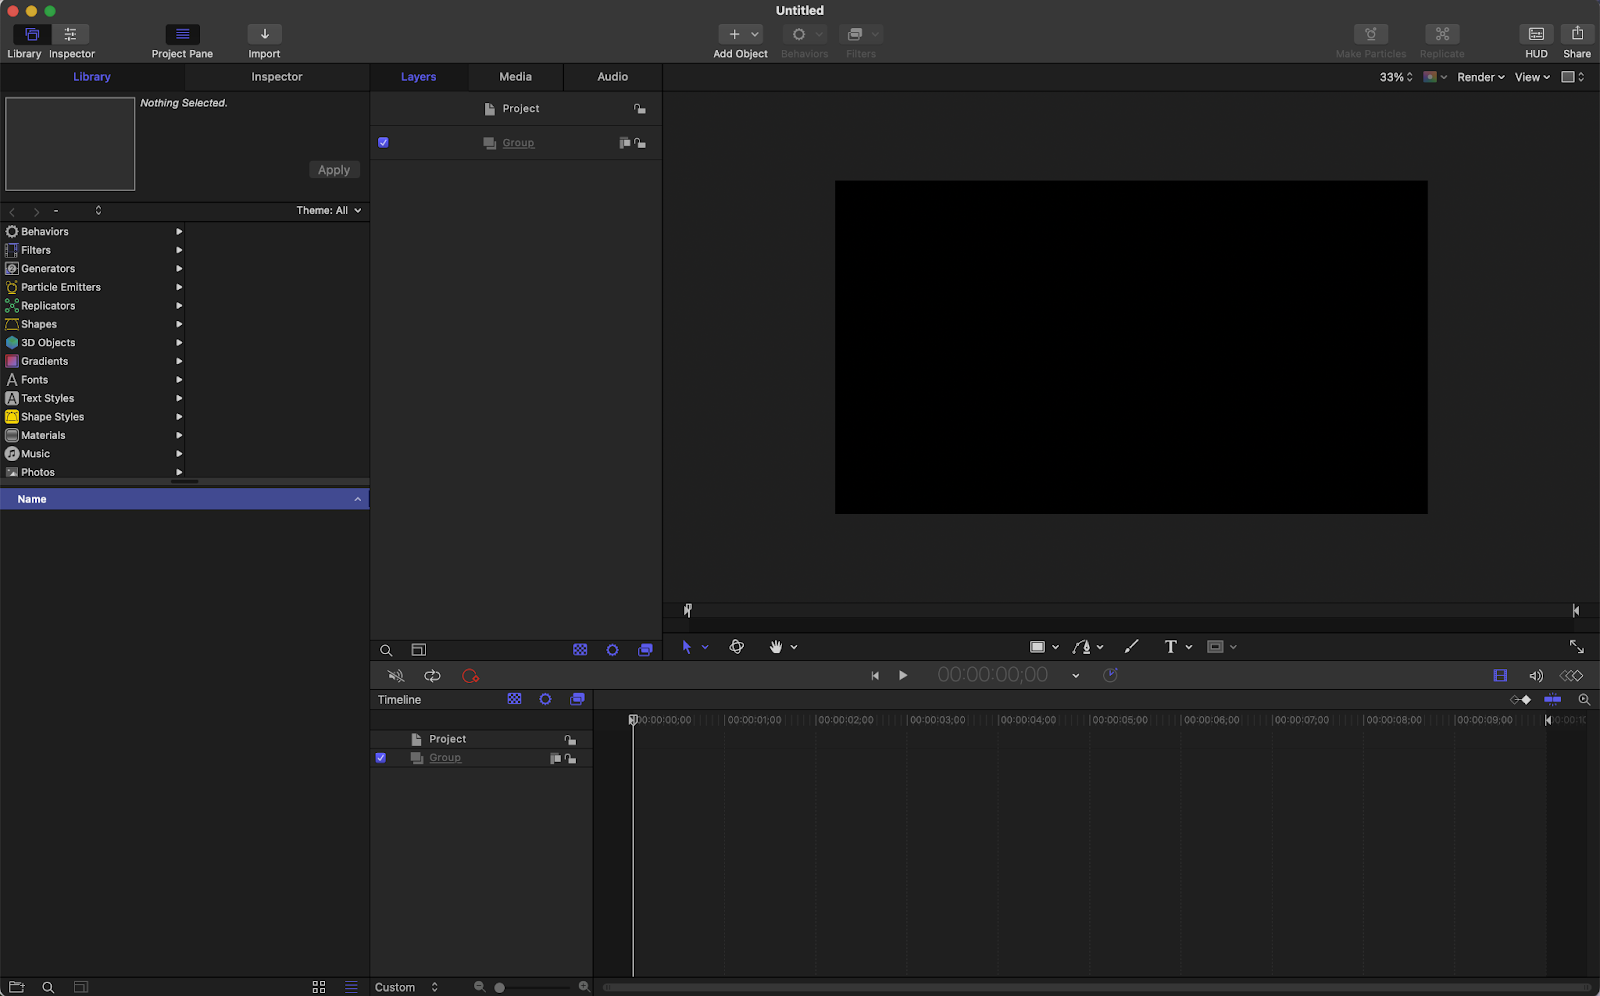
This is the default layout of Apple Motion’s workspace. On the right-hand corner, is your library and properties inspector, beside that is your layers, media, and audio tab, the composition window, and at the bottom part is your timeline.

Your main tools are located between your composition window and timeline window.

Navigation

Navigating the interface of Apple Motion is very quite easy, but there are a few main areas you just need to familiarize yourself with.

Let’s start by creating a simple shape for our composition. Go to library > shapes > rounded rectangle > apply. 

Layers and Assets

Now that we have a shape in our composition, we can see that a new layer has popped up in our timeline, and a layer has shown up in the layers tab. Any time you add a layer or a file to your project, it will be listed in the “Layers” tab.

Transform Options

Each layer you add in your timeline will have its own separate Inspector tab. Inside the Inspector tab, you have the Properties tab, Behaviors, Filters, and Shape Properties. The Properties Tab is divided into two parts, (1) transform properties and (2) blending properties.

Keyframes can be set by clicking the diamond icons.

Effects and Filters

The Effects and Filters will be your best friends, especially when you  want to create cool animations. The filters, located at the top center of your interface, are divided into different categories. Some of these can take a heavy load on your system, especially when you start combining them, so be aware.

To add a filter on your layer, select your target layer > filters tab > distortion > fisheye.

Now you will notice that the filters tab is activated together with the filter and its properties.

You will notice that after applying the fish eye effect, nothing happened and your result is different than mine. 

In this case I want you to to go Group > Group > Check Fixed Resolution

Final Thoughts

The Effects and Filters will be your best friends, especially when you  want to create cool animations. The filters, located at the top center of your interface, are divided into different categories. Some of these can take a heavy load on your system, especially when you start combining them, so be aware.

Leave a Comment

Your email address will not be published. Required fields are marked *